This article is the second in a series of proposals for new “bikepacking” areas around Mount Hood and in the Gorge — places where cyclists can ride to overnight, off-road campsites. As with the earlier Waucoma Bicycle Backcountry proposal, the concept here is to convert fading logging roads into dual-track bicycle routes, complementing existing single-track trails that already exist in the area.
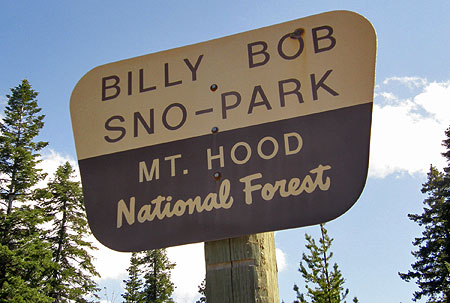
This proposal focuses on the potential for the Billy Bob Sno-Park to be put to work year-round, using the otherwise vacant facility in the snow-free season as the gateway to a new mountain bike network. The trailhead would become the hub of the newly created Mount Hood National Recreation Area (NRA) unit that covers the Fifteenmile Creek canyon backcountry, and was designed with backcountry bicycling in mind.
The Billy Bob Trailhead
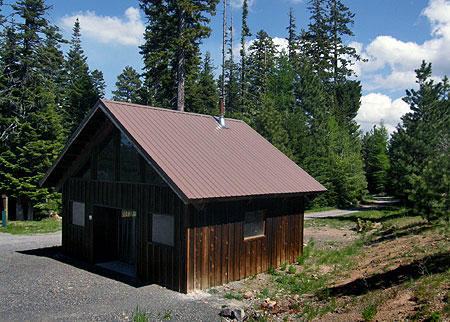
The Billy Bob Winter Shelter
The existing Billy Bob Sno-Park features a winter shelter, complete with wood stove, and is provided for snowmobiles and Nordic skiers. A local snowmobile club is under contract with the Forest Service to groom some forest roads as snowmobile routes, while ski trails are un-groomed and seldom used. Snowshoers also use Billy Bob as a base for reaching the nearby Fivemile Butte and Flag Point lookouts, as both can be rented during the winter.
The winter shelter is at the south end of a very large, paved turnaround suitable for up to 40 vehicles, including trailers carrying snowmobiles. Like the nearby Little John SnoPark, the parking area appears to be an asphalt relic from the logging heyday of the 80s and 90s, originally serving as a loading area for log trucks.
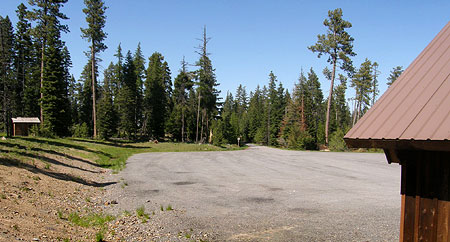
Plenty of parking here..!
A pit toilet is also located here, at the northwest corner of the turnaround, opposite the shelter. Presumably, the toilet is kept snow-free in winter, but is also open in summer (though not regularly serviced… ahem!) to the rare visitor in the off-season. There is no water provided at Billy Bob.
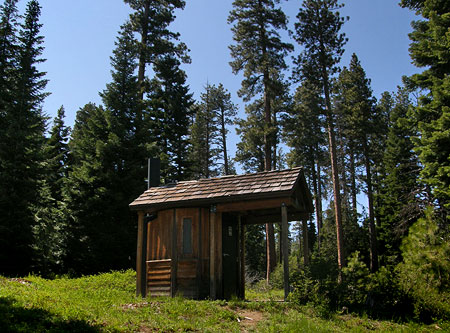
The “modern” pit toilet at Billy Bob is relatively new
In addition to winter use by snowmobiles and occasional skiers and snowshoers, Billy Bob is sometimes used as a base camp during the fall hunting season, as the surrounding area remains popular for hunting.
Fortunately, the site is far enough from population centers and major highways that it has largely been spared from the dual scourge of illegal dumping and target shooting that plagues similar pullouts and trailheads on the west side of the mountain.
The Proposal
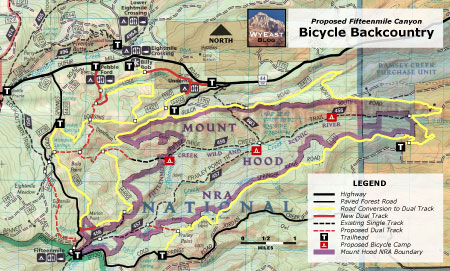
How would the new Fifteenmile Canyon bicycle backcountry work? The first step would be conversion of a number of old logging roads in the area to become dual-track bike trails. In this way, the routes could also continue to function as snowmobile or ski trails in the winter. These proposed routes are shown in yellow on the map.
Next, a few new dual-track trails are proposed (in solid red) where they would better connect the existing network of logging tracks and directly connect the Billy Bob site to nearby drive-up campgrounds at Pebble Ford and the Underhill Site. Abandoned logging spurs make up the bulk of these new routes, so little new construction would be required to complete these dual-track gaps.
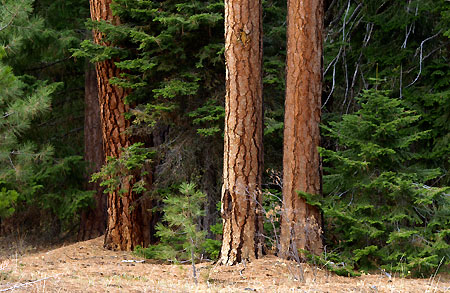
Recovering ponderosa forests in the area are a reminder of the clearcutting heyday of the 80s and 90s
The purpose of dual-track trails is to provide less experienced cyclists and families with young kids a less challenging, more relaxed alternative to single track for trail riding. Dual-track routes allow for cyclists to easily pass on the trail, so are a good solution for busy trails where riders with a range of skill levels are expected. The dual-track design would also allow for safer shared use by cyclists, hikers and horses.
In Fifteenmile Canyon, the proposal calls for converting several roads to dual track to create a loop system located along the boundaries of the new Mount Hood NRA. The dual track loop would be gated, with motorized entry limited to service vehicles for maintenance or emergency access.
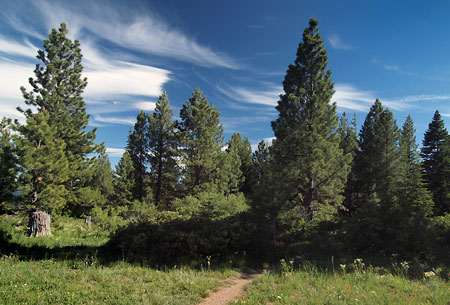
Stands of large ponderosa and larch are still intact within the canyons of the Eightmile NRA
Within the proposed dual-track loop system, the NRA is centered on the steep maze of gulches, draws and ravines that form thousand-foot deep Fifteenmile Creek canyon. Three existing hiking trails (dashed black on map) extend into the canyon, one following Fifteenmile Creek, and two climbing the north and south slopes of the canyon, connecting to area campgrounds.
The proposal would fill in a few gaps in the existing single-track trail network that explores the Fifteenmile Creek backcountry, including (in dashed red on map) a new route that would extend west from the creek canyon to Bulo Point, a lovely, almost forgotten viewpoint, treated badly during the recent logging bonanza. A new single-track tie would connect the Pebble Ford and Fifteenmile campgrounds and short tie near Fraley Point would complete the single-track system.
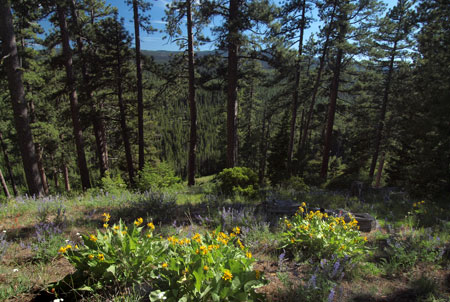
Ridgetop meadows and interesting rock outcrops are found throughout the area
The trails at the heart of the Fifteenmile Creek backcountry traverse some of the most ecologically diverse terrain in Oregon, from sun-baked Oregon white oak stands and open balsamroot meadows on sunny slopes and ridgetops to giant ponderosa and western larch parklands along canyon slopes. There are even lush, shady Western red cedar and red alder groves tucked along Fifteenmile Creek.
The proposal calls for three new bicycle camps within this beautiful, quiet backcountry. These campsites would consist of 4-6 groomed tent sites, one or two picnic tables, fire rings and secure bike racks — a comfortable step up from the truly primitive level of wilderness, but still providing a rustic backcountry experience. This, after all, is what the NRA was created for!
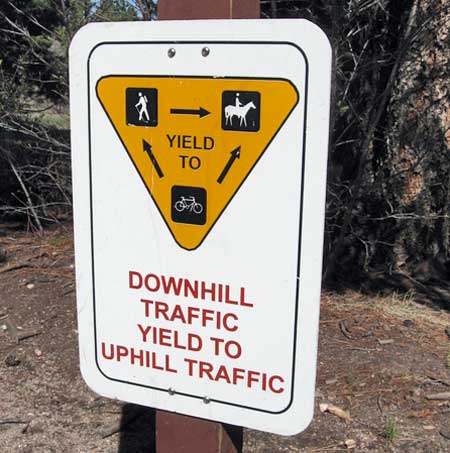
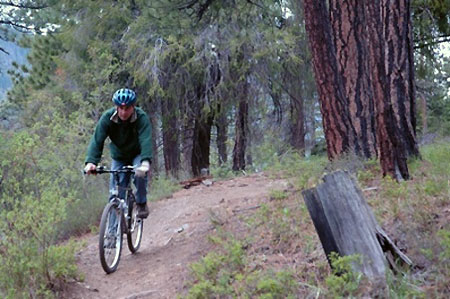
The Billy Bob concept calls for 3-way sharing by trail users
A total of ten trailheads are shown on the proposal map. Some already exist, some would be new, but all would need to be upgraded under this proposal to be geared toward backcountry cyclists. This includes a complete trail map with difficulty ratings for trail segments, information on the backcountry camps and “share the trail” information for all users — as these trails would continue to serve hikers and horses, as well as cyclists.
Connections to Points Beyond
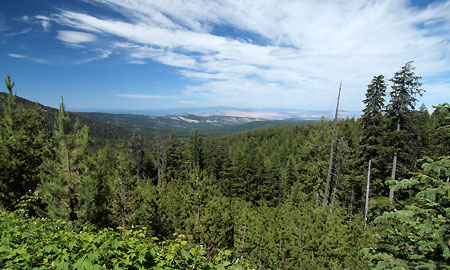
Views into the Columbia Basin desert abound from the many high points in the Fifteenmile backcountry
The main focus of the Billy Bob trailhead proposal is the “bikepacking” potential for the Fifteenmile Canyon backcountry, but a wealth of nearby destinations are close enough to make for fine day trips from the proposed new trailhead.
Nearby Fivemile Butte is already a popular goal for cyclists, with a lookout tower and picnic tables that provide for a rewarding destination. The Flag Point Lookout is also within reach, and still in service during the summer, providing an especially interesting destination, as the lookout staff usually welcome visitors with a tour of the tower.
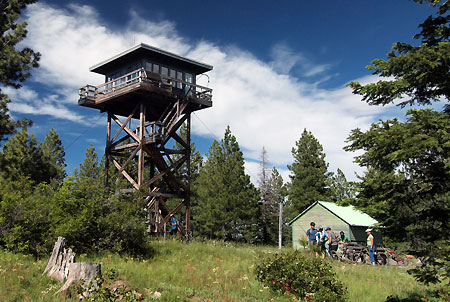
Cyclists visiting the Fivemile Butte Lookout
Lookout Mountain is also within reach, although the summit trail falls within the Badger Creek Wilderness, and thus is off-limits to bikes. But cyclists can still ride to High Prairie on a mix of trails and primitive roads and make the short final ascent of the mountain on foot — an equally satisfying option to riding.
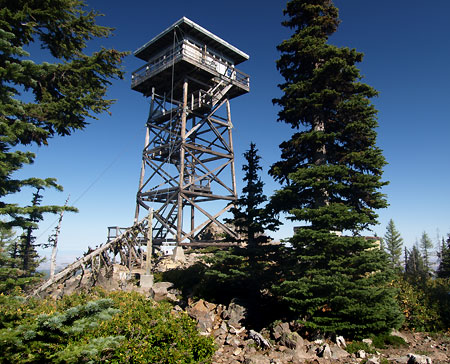
The remote Flag Point Lookout is still staffed in summer
The Boy Scouts operate Camp Baldwin just to the north of the proposed bicycle backcountry, with a summer camp program that draws thousands of scouts each year. The camp program includes mountain biking into the surrounding forests, so the proposed Fifteenmile bicycle backcountry would be a natural fit for the Scouts. Even better is the possibility of an ongoing partnership between mountain biking organizations and the Scouts to build and maintain trails in the area over the long term.
Does it Make Sense?
The Surveyors Ridge area to the west of Billy Bob and Fifteenmile Canyon is already a very popular cycling destination, with overflowing trailheads on most summer weekends, so there seems more than enough demand to justify this proposal. More importantly, the Fifteenmile backcountry would provide a unique, overnight “bikepacking” experience for cyclists that doesn’t exist elsewhere on Mount Hood’s east side.
Cyclist on popular Surveyors Ridge (The Oregonian)
An emerging bicycle sport that could complement summer riding on the proposed trail nework is “fat biking” or snow biking. Fat bikes use oversized tires to put cyclists on snow-covered trails in winter, and it’s possible that the Billy Bob trailhead and proposed bicycle network could serve this growing form of cycling.
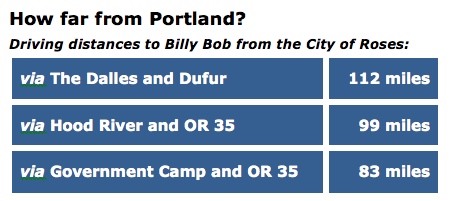
Likewise, Nordic skiing and snowshoeing are continuing to grow in popularity, and though winter access to the Billy Bob trailhead is a long ride from the Portland area it could provide an important option for Gorge-based visitors looking for something away from the Portland crowds that often overwhelm Mount Hood on winter weekends.
What would it take?
Like the earlier [link=]Waucoma Bicycle Backcountry[/link] proposal on this blog, the viability of this proposal is in its simplicity: less than eight miles of new trail would open a 50-mile network, with dozens of loop options that could be tailored to the ability of individual mountain bikers.
Most of the work required could be done with the help of volunteers, from trail building and campsite development to signage and ongoing maintenance. Some heavy equipment would be required to develop the main trailhead at Billy Bob and to decommission vehicle access on some of the converted roads, and would have to be provided by the Forest Service.

Views from the open ridgetops in Fifteenmile Backcountry extend north to Mount Adams and Mount Rainer in Washington
The proposal would also require the Forest Service to fully devote the Fifteenmile Canyon to quiet recreation during the snow-free months. A few years ago, that would have been unlikely, but in recent years, the agency has not only adopted plans to phase out hundreds of miles of logging roads, but also adopted a new policy to focus OHV use in a few, very specific areas of the forest.
These recent developments could move this proposal if public support exists for a bicycle backcountry, although the Forest Service will need continued support from quiet recreation advocates to convert old logging roads to trails: recently, the agency has put plans to phase out old roads in the Barlow Ranger District that encompasses the Fifteenmile backcountry on hold, due in part to pressure from OHV groups.
The good news is that mountain bicycling organizations are already working hard to develop trails elsewhere in the Mount Hood region and hopefully would find this proposal worth pursuing, too. If you’re a mountain biker, you can do your part by sharing this article with like-minded enthusiasts, or your favorite mountain biking organization that could serve as a champion!
____________
Bikepacking Resources:
Bikepacking.net is an online community that focuses on off-road touring, away from cars, with great information on gear, routes and trip planning.
The Adventure Cycling Association posted this helpful article on how to pack for your bikepack trip.
The International Mountain Bicycling Association (IMBA) is the premier organization and advocate for backcountry bicycling.
In the Mount Hood region, the Northwest Trail Alliance is the IMBA Chapter doing the heavy-lifting on bicycle trail advocacy.
The IMBA has a guide to fat biking.